


16 min reading
Local Landing Pages for Better Local SEO
Google Tag Manager (GTM) is a free tool from Google that lets you add, manage, and update tags on your website without involving developers. It makes it easy to set up analytics, ad pixels, scripts, or even a cookie consent banner, all in one place.
GTM comes with a robust set of built-in tags, including Google Analytics, Google Ads, Floodlight, Hotjar, LinkedIn, and more. But sometimes that’s not enough, for example, when you need to:
In these cases, people typically fall back on Custom HTML tags. They are powerful but come with downsides: low security, a lack of structure, and no parameter validation. That’s exactly why Google introduced Custom Templates.
Templates are custom tags or variable templates in GTM, built on sandboxed JavaScript, an isolated environment where the code can run safely. In simple terms, it’s a secure way to add custom logic to GTM and share it with others without the risks that come with Custom HTML. Each template has a JSON structure that describes what the code is allowed to do (e.g., fetch or logToConsole), which input parameters it accepts, and which UI fields should appear for users (variable names, checkboxes, selectors, etc.).
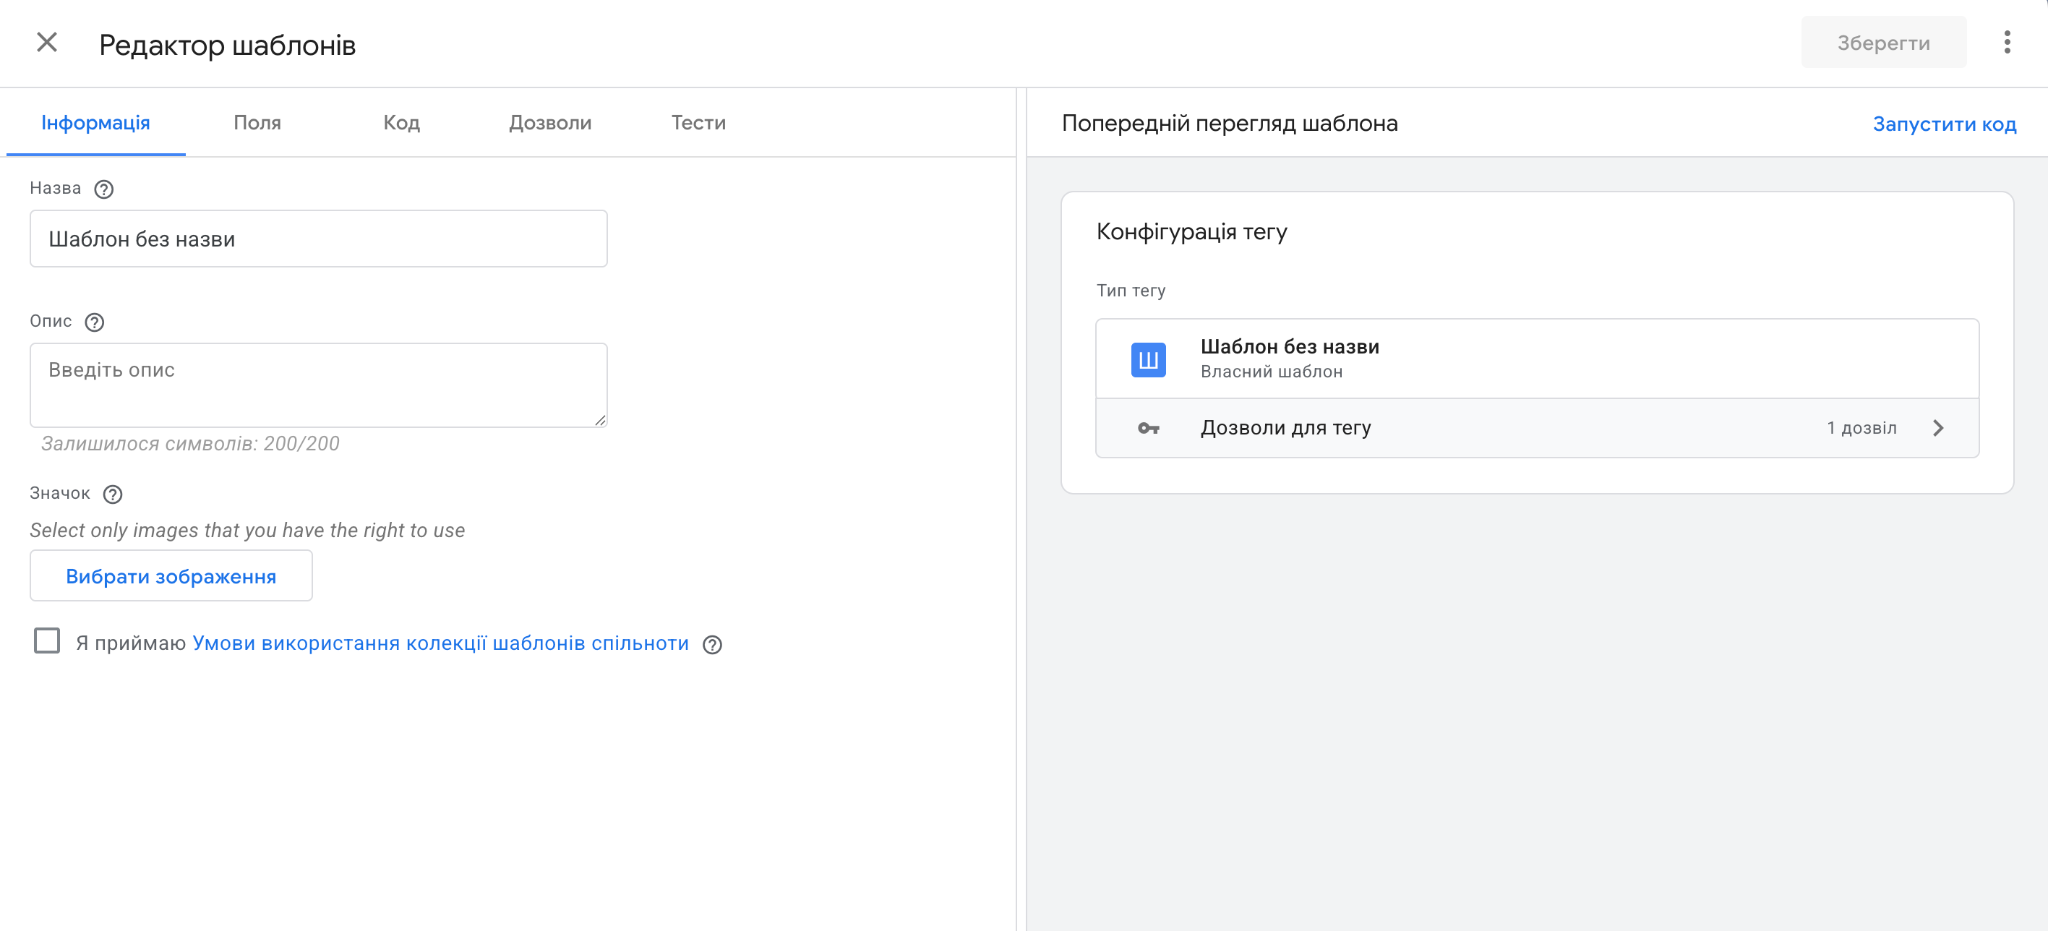
Essentially, a Custom Template is a mini-app within GTM.
Custom Templates let you:
Google provides an official repository, Community Template Gallery. Here you can find hundreds of verified templates from Meta and TikTok to Sendinblue or Klaviyo. Add it to your container and use it just like any other tag or variable.
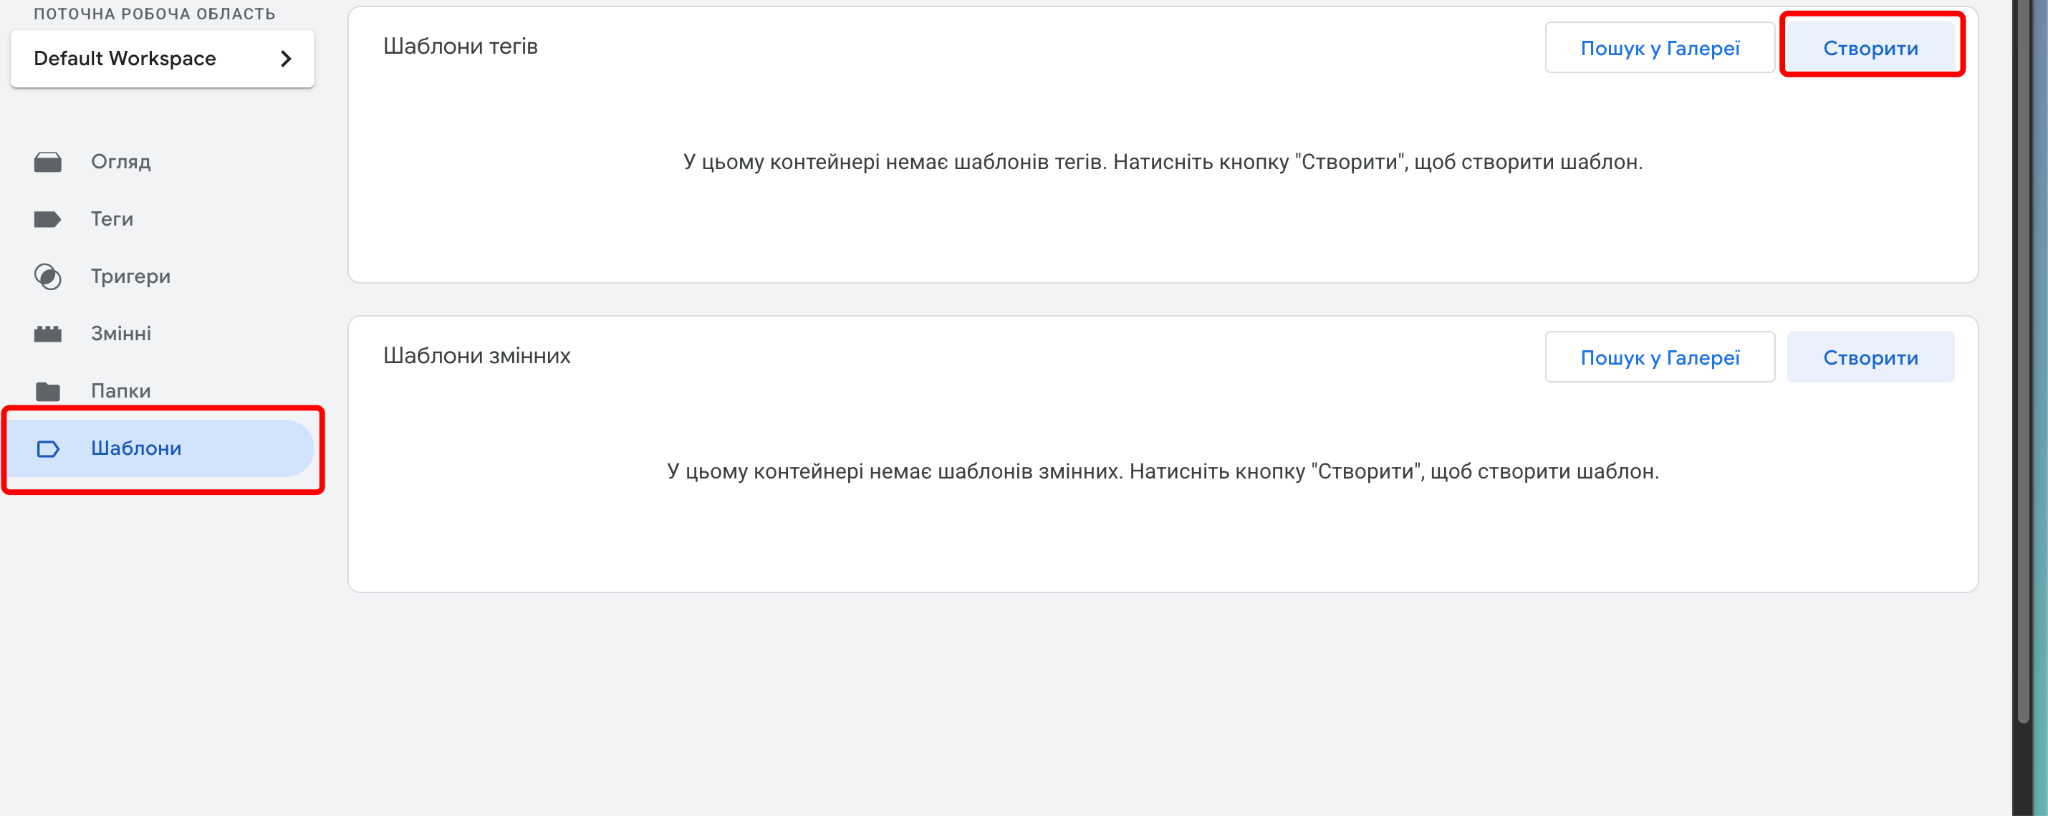
If the built-in templates or the ones from the community gallery don’t cover your needs, you can create your own. GTM includes a dedicated Template Editor for that:
1. In Templates → New → Tag Template, click Create.
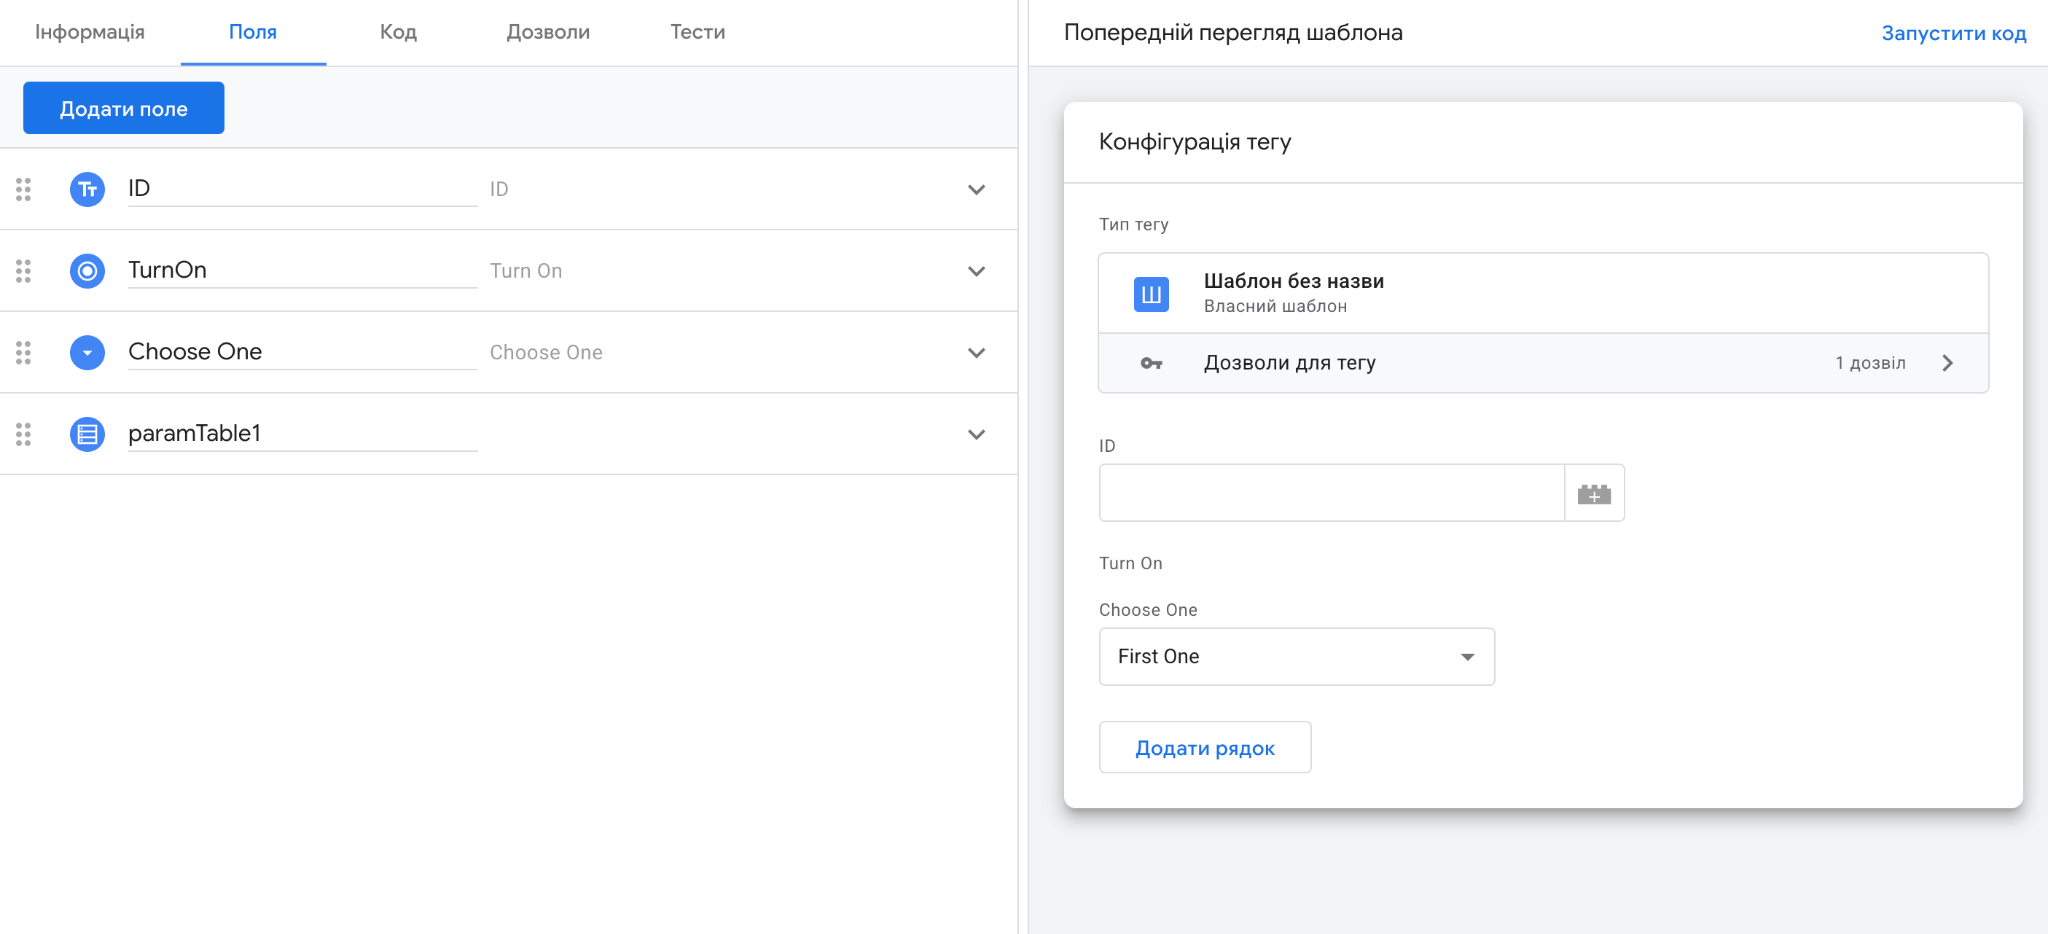
2. Define which fields the user can fill in (for example, a pixel ID or an API key).
3. Add your code in the Code tab, as it runs inside a sandboxed environment.

4. In Permissions, allow only the actions your template actually needs (for example, Send HTTP Request).

5. Save and test the template, and now you can use it just like any standard tag.
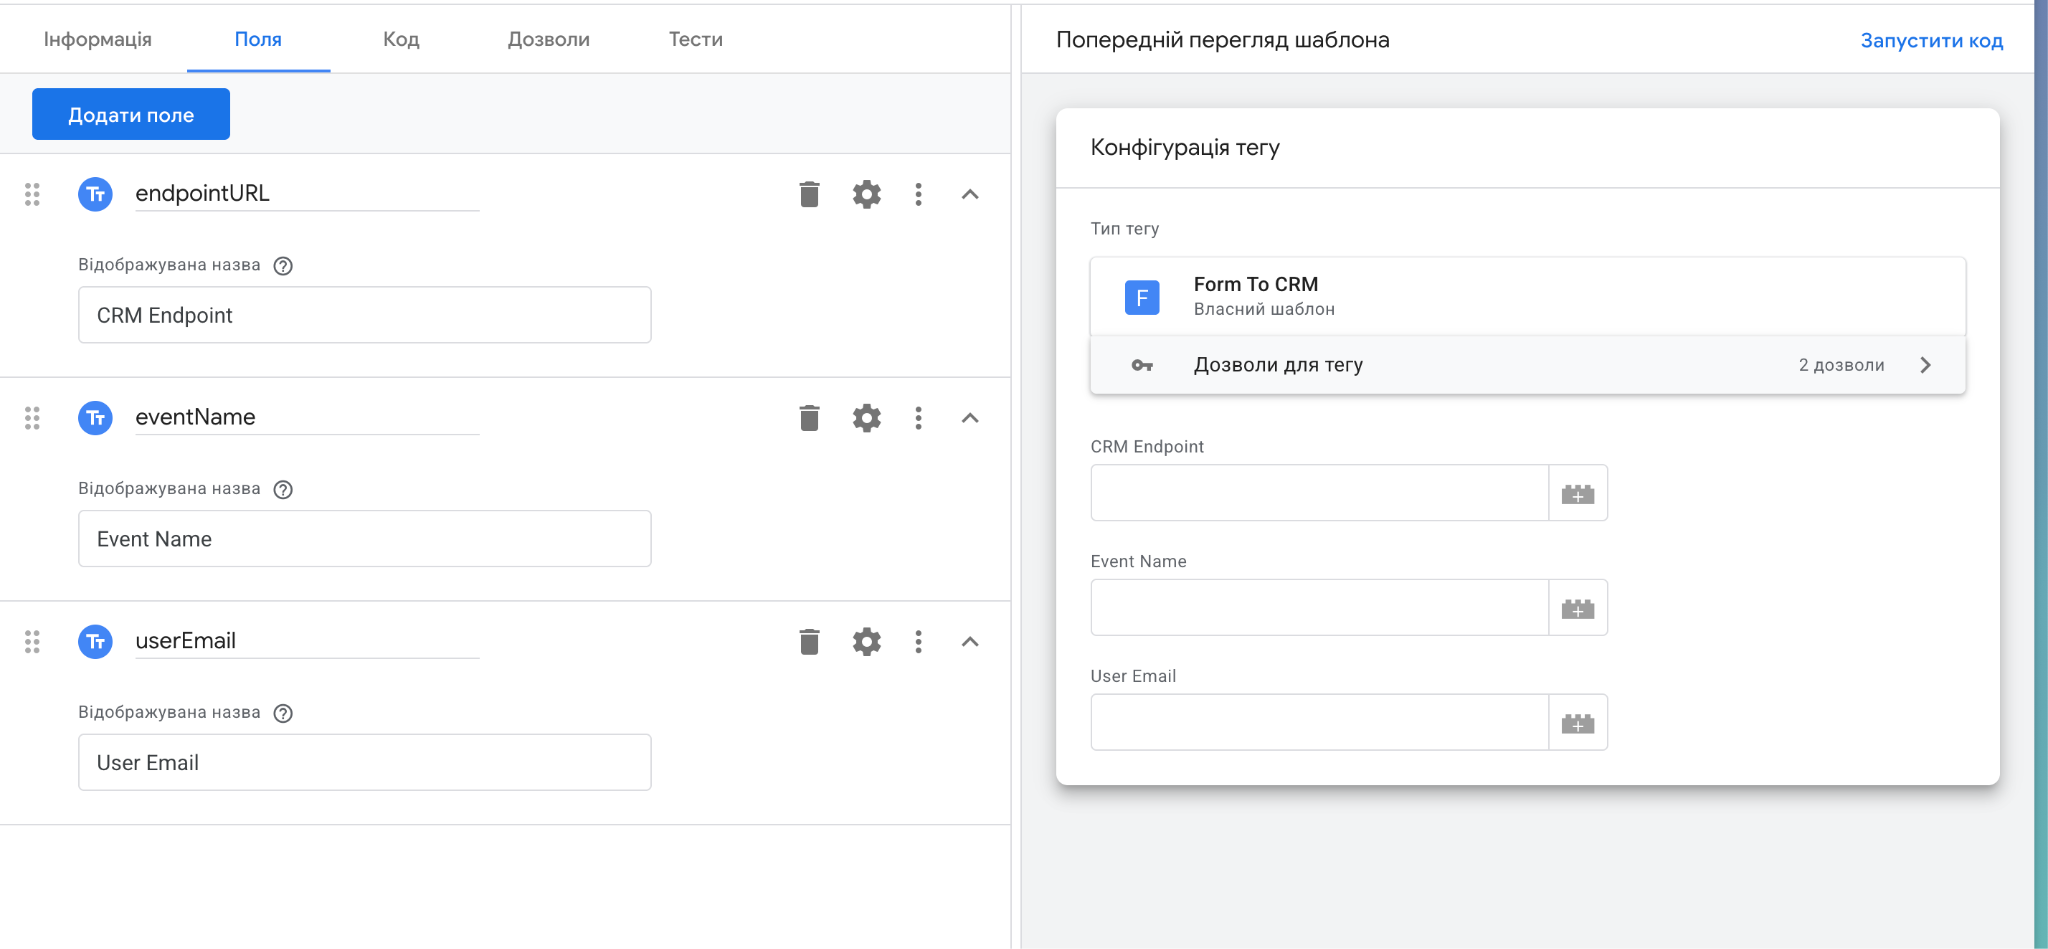
Let’s say you want to send every Form Submit event from your website to your CRM via webhook. Instead of relying on a Custom HTML tag, you can build a secure Custom Template in the Template Editor.
Template fields (Fields tab):
| Display name | Type | Variable name | Default value |
| CRM Endpoint URL | Text | endpointUrl | https://example-crm.com/api/event |
| Event Name | Text | eventName | form_submit |
| User Email | Text | userEmail | (empty) |
Template code (Code tab):
// Sandbox APIs


const queryPermission = require('queryPermission');


const getUrl = require('getUrl');


const sendHttp = require('sendHttp');


const logToConsole = require('logToConsole');


const JSON = require('JSON');


// 1) Safely read gclid from URL (only if allowed in Permissions)


var gclid = null;


if (queryPermission('get_url', 'query', 'gclid')) {


  gclid = getUrl('query', false, null, 'gclid'); // returns string|null


}


// 2) Build the payload


const payload = {


  event: data.eventName,


  email: data.userEmail


};


// Add gclid only if available


if (gclid) {


  payload.gclid = gclid;


}


// 3) Send POST request


sendHttp(data.endpointUrl, {


  method: 'POST',


  headers: { 'Content-Type': 'application/json' },


  body: JSON.stringify(payload)


})


.then(function(response) {


  logToConsole('✅ Event sent to CRM', {


    status: response && response.statusCode,


    payload: payload


  });


  data.gtmOnSuccess();


})


.catch(function(err) {


  logToConsole('❌ CRM request failed', err);


  data.gtmOnFailure(err && err.message ? err.message : 'Request failed');


});
Setting up the tag and testing (Testing + Preview tabs):
Save the template → Tags → New → Tag Type → Custom → Send Event to CRM
Fill in the fields:
Now add a trigger (for example, Form Submission or Click). Then enable Preview, repeat the event, and you will see the log and response status in the console.
That’s it! Nothing too complicated!
Custom Templates are the next step in GTM evolution. They:
If you often work with custom events or APIs, give Custom Templates a try. They will save you time, reduce headaches, and make your GTM container much more professional.


“Livepage has proven to be a reliable source for rapid online growth. We started with 2,000 visitors per month. In 3 years together with Livepage we have reached 70,000 visitors and more than 100 leads from the site per month.”


“As for the results, we’ve been working together since 2015, and our traffic has increased 10x. I cannot say that Livepage was our first SEO company, but they have become the first SEO partner that helped us to achieve the success we were looking for.”

“Livepage delivers SEO efforts that have led to an increase in the site’s users, traffic, and conversions. The team uses a wide range of tools to achieve the client’s goals. They are attentive to the client’s needs, working with them in real-time and bringing in additional specialists when needed.”


“I am pleased with the quick task execution and the instant replies to my messages.”


“I like the complex approach that the Livepage team offers. Absolutely all team members work together; everyone is aware of what is happening on the project. We have one common goal – to increase our service sales, and the team is making every effort to achieve the goal as soon as possible.”


“We’ve been really impressed by how Livepage quickly understood our business and centred our PPC campaign around our objectives. We have achieved good results within a very short time in both revenue and ROI.”


“Everything is clear, timely, and understandable.”


“They have leveraged ideal opportunities to reach our business goals.”
